
New year, New handbag. You can never have too many handbags, in different colours, shapes, sizes, fabrics.... So why not sew your own?
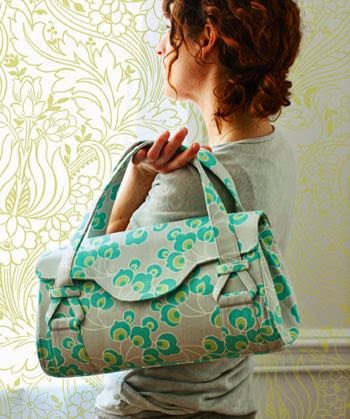
This Amy Butler sewing pattern is available over on Sew Mama Sew and it's completely FREE! It even comes with two different strap lengths so you can decide which is best for you (or make both!?).
This pattern is well written and easy to follow. We made a couple of changes to the original design; we changed the shape of the flap to a curve, rather than the cut out shape of the pattern. This did mean we had to lower the 'tags' where the handles are sewn onto the bag to accommodate the new shape.
Secondly, instead of using 'Peltex' as the instructions call for, we improvised with super stiff interfacing. We used strong interfacing (as the pattern suggests) to line the majority of the pieces, but then instead of Peltex we used strong interfacing ironed onto pieces of cotton. This was far more cost effective and provides enough stability to shape the bag. To support the bottom we cut a piece of plastic and slid it in between the layers before attaching the lining to the outer bag. You can just use a piece of cardboard for this if you don't have any suitable plastic to hand.
We chose to make the bag out of a faux suede fabric and to cover the bag flap in skull studs. If you want to attach studs yourself its best to do this before you start sewing any of the pattern pieces together, just be sure to take the seam allowances into account when deciding on the layout of your studs.This pattern is well written and easy to follow. We made a couple of changes to the original design; we changed the shape of the flap to a curve, rather than the cut out shape of the pattern. This did mean we had to lower the 'tags' where the handles are sewn onto the bag to accommodate the new shape.
Secondly, instead of using 'Peltex' as the instructions call for, we improvised with super stiff interfacing. We used strong interfacing (as the pattern suggests) to line the majority of the pieces, but then instead of Peltex we used strong interfacing ironed onto pieces of cotton. This was far more cost effective and provides enough stability to shape the bag. To support the bottom we cut a piece of plastic and slid it in between the layers before attaching the lining to the outer bag. You can just use a piece of cardboard for this if you don't have any suitable plastic to hand.
 |
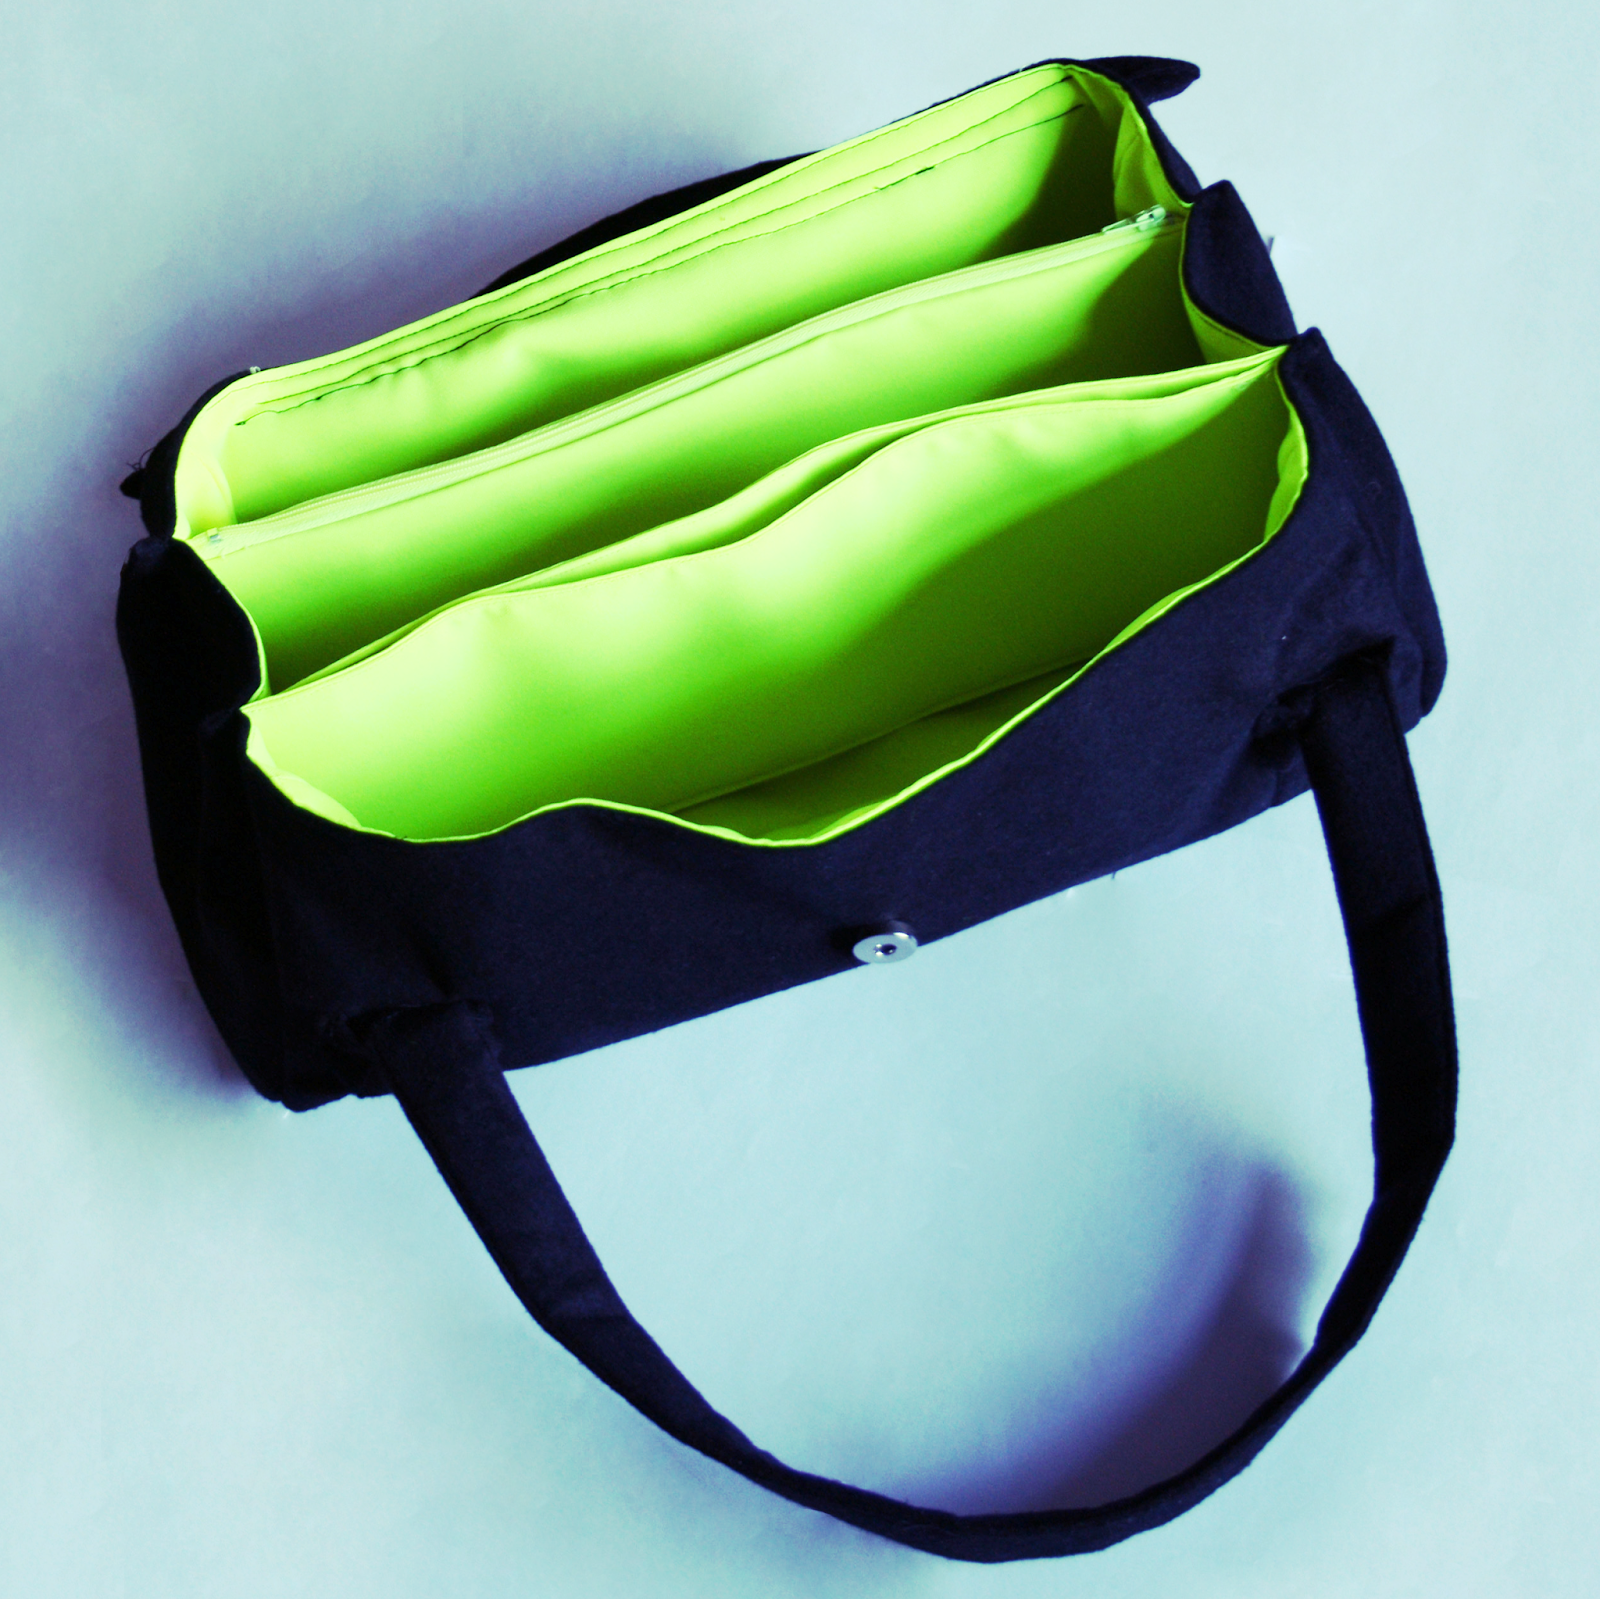 |
We love the inside of this bag thanks to the bold contrasting neon yellow lining and the two divider pockets, one of which has a zips. Compartments are key to a great bag and this pattern has it right.
You will need a needle that is able to cope with thick fabrics once all the layers are built up especially when attaching the flap to the main bag. Also we decided to hand stich the final gathers in the side as it simply wouldn't fit under the sewing machine foot!
The possibilities of adapting this pattern make it essential to your fashion DIY collection. Especially as it's free, you have nothing to lose!
We'd love to see any bags you've made yourself.
Love
F*2DIY4 x
@fashiontodiyfor #fashionDIY


